


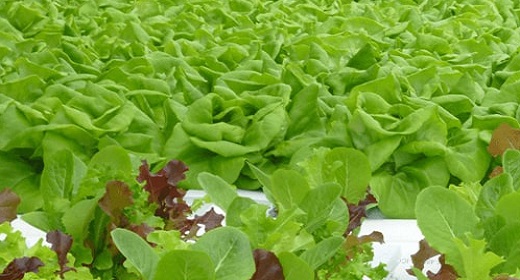
by Rene Smith: It is no surprise to see people using hydroponics to grow lettuce…
The best part? If done in a correct manner it can result in growing the lettuce within a short period of time. Not to forget that it is extremely easy, productive and fun way to cultivate a crop in your household.
You may not want me to read this, but here we go…
Hydroponic is not free from problems. The dangerous combination of electricity and water makes hydroponic lettuce germination quite difficult since all the power that is being used is in relation to the water supply. This makes it extremely critical to be careful while performing any electrical maintenance since an electric shock can intensify by wet skin.
The other problem is water leaks which can create a major problem while growing hydroponic lettuce successfully.
Also, the use of non-food-grade plastics as a way to save money can backfire in a great way as it can contaminate the lettuce since it contains dangerous chemicals that can harm the crop adversely.
Plant pests like spider mites can drain the sap from the leaves hence, always ensure that you use specific insecticides against them instead of a broad-based insecticide.
Power outages are another problem that can have a drastic effect on the growth of your hydroponic lettuce.
Here’s the deal: If you have already faced these problems while growing high-quality hydroponic lettuce then the tips that we have mentioned in this write-up will work as your saviour and help you to grow high-quality hydroponic lettuce through the plastic bottle hydroponic lettuce cultivation process within 45 days.
So, without much ado let us get started with the tips.

Plastic Bottle Hydroponic Lettuce Cultivation Process: A Secret that will Help you to Grow High-Quality Hydroponic Lettuce
Here is what you need to know…
If you do not have a land to grow a hydroponic garden but have plenty of sunlight coming from windows you can use a compact and low maintenance trick to grow lettuce in your house.
The ultimate purpose of this exercise is to ensure that you do not have to spend a lot of money. The few things that you need to buy will cost around $ 10 which will provide enough material for many of the bottles.
It is extremely low maintenance without any need for electricity so there is no threat of electricity harming your hydroponic lettuce growth.
The materials needed are extremely easy to find.
Here’s the deal: The great part is that it actually works and we have seen that from our own eyes.
The roots that emerged were healthy and there was no sign of lack of oxygen which is a great news.
The small bottles need a compact space of about 3 inches and larger ones about 5 inches which can fit in your window easily.
It is even possible for you to hang the bottle in the vertical space of the window.
Keep reading:
Let us now look at the materials that you will need to implement this process:
- A plastic bottle larger than 2 Litres.
- A shower scrunchies
- Scissors
- A knife
- Aluminium foil
- Tape
- Seeds
- Hydroponic growth media

Step 1 Start the process by transplanting the seeds in the plastic bottles to reap the benefits of high-quality hydroponic lettuce
Here’s the truth,
Directly transplant the soilless seed in the plastic bottles. If you do not want to spend money on seed starter mix get a shovel, trowel or your hands and get your hands dirty by getting soil.
Although if you are a real hydroponic purist you may not like this idea since technically hydroponics does not use soil, even if you use it we won’t tell anyone!
Then make an egg carton seed starter by getting some eggs. Use the eggshells in your growth media. The plastic carton will have three sections: two “egg cup” sections that cradle the eggs, and the one flat lid.
Cut the lid and use it as a tray to hold water.
Then poke holes in the different egg cups in such a way that the entire water drains out.
Use the other section of egg cups as lids, to form dozens of greenhouses.
Water it once and leave them alone for seven days.

Step 2 Cut the bottle in such a way that there is enough space to add or remove water through the hole
Cut the top of the bottle roughly half an inch below the “shoulder” of the bottle.
Now: Leave roughly half an inch of the straight side on the “top” part of the bottle, in such a way that the sides of the “bottom” get the desired grip when it is flipped over.
Puncture the blade meticulously with the blade and cut along the line.
Cut a small hole below the top. This will enable air to flow to the bottom root chamber.
You will then be able to easily add or remove water through the hole.
If you are taking it from one to another do not forget to cover it to prevent any spills.

Step 3 Cut the cap carefully in such a way that there is no damage to your hand
Here’s the truth.
Cut the caps in such a way that the threads are left untouched.
Use a sharp knife and be extra careful.
Place the cap upside down on a smooth surface in such a way that one edge is just over the other.
Hold it tightly and ensure that no part of your hand is under the cap.
Use the knife through the inside of the cap, at the edge.
The blade will cut in a single direction.
What’s the bottom line here? Keep using the blade through, approximately a blade width away from the previous cut in such a way that the blade cuts back towards the last slit.

Step 4 Add mesh to the cap so that the plant and support media do not fall into the water
Take out the mesh scrunchies and cut the string in such a way that it holds together and the whole thing can be unwound.
Keep reading: Cut a bit of the mesh approximately a few inches and stretch it over the bottle’s mouth.
Then tighten the cap over that.
If there is any excess cut it off.
What’s the bottom line here? The end result would be a funnel capped with mesh at the mouth.
This will ensure that the plant and support media do not fall into the water.

Step 5 Give support to the roots that will remain above water by making an aerial root support basket
Here’s the truth: It is important for you to protect the roots of lettuce especially when they will remain above water.
If you do not provide adequate support to them it will result in the aerial roots to clumb together and this way they will not be able to absorb enough oxygen.
Take a long mesh tube and tie a knot at one end, pull the knot and cut off the excess.
Approximately cut off 6 inches of mesh so that you get a mesh bag at the bottom.

Step 6 Figure out the water level by pouring some water in the mouth of the funnel until it is just barely touching the water
Here’s the deal: Fix the whole thing and check the water level.
You can do this by placing a mesh basket around upside down the funnel in such a way that the mesh hangs loosely.
But, ensure that there is enough space between the funnel and the base.
If everything looks fine, mark the bottle side at the level of the funnel mouth.
Pour some water in the mouth of the funnel until it is just barely touching the water.

Step 7 Develop hydroponic fertiliser growth media to achieve success with lettuce cultivation
Here’s what you need to know: To develop hydroponic fertiliser growth media follow these steps:
Take 1 litre of water and dissolve 1/16 teaspoon Epsom salts. (Never select Epsom salts that contain mint fragrance or other additives). Get 5 drops eggshell extract.
The best part: (We have utilised this formula and have achieved great results. The plants have become large, healthier and are growing quickly)
If you have calcium and micronutrients, use eggshell dissolved in lemon juice.
This will buffer the pH since the growth media tends to get too basic (high pH).
The eggshell has the right quantity of magnesium, calcium and all the other micronutrientsrequired by the plants in the right proportions.
Let us now check out the process:
Take an eggshell, leave the membrane intact and dry it completely.
Crush it finely and then mix it in lemon juice using these measurements:
Half a teaspoon of dried powdered eggshell
The juice of half a lemon (approximately one and a half tablespoons)
Leave it overnight by keeping it in a covered jar.
This will give you about 2 litres of growth media. In case you want to make 1 litre of growth media add only 1 teaspoon.

Step 8 Manage the grow bottle to help proper growth of lettuce
In case you are transplanting seedlings in the bottle do it gently in such a way that they are placed just around the roots.
Keep reading: Put the root ball in the funnel, and smoothly close down the bottle cap.
If there is any excess soil that does not fit remove it off.
Always have enough media to hold the stem upright. It should be approximately an inch deep to fit the bottle cap.
Next, pour the water into the funnel and let it drain through the mouth.
This will ensure that all the particles that would have clouded the water to flush out.
It will also flush out the roots through the mesh.
In case you are starting with the seeds in the funnel, fill the cap with an inch of seed starter, sand, soil or vermiculite and plant the seed.
Yes, we know that this is not something which hydroponic purists will like. In that case, you can start the seeds in peat, rock wool or whatever you find perfectly fine with you.
Once the seeds or plants are in the funnel, fill the base with growth media as suggested in the previous step and assemble the bottle.
Here’s the deal: Put the mesh root support bag around the upside-down funnel, in such a way that mesh hangs loosely. It should be approximately an inch below the funnel’s mouth.
Always have enough space between the funnel and the root support mesh.
Press the funnel down into the base in such a way that the mesh basket is held between the funnel and the base.
Next, cover the area below the water level with foil so that there is only direct contact of sunlight.
Step 9 Maintain the process and water the plants once the water level drops for healthy growth of hydroponic lettuce
What’s the bottom line here? Once you have set up the process, it will become easier to maintain it with absolutely no care.
But, you will be required to water the plants once the plant starts consuming water.
Remember, you want the plants to breathe which the air hole will enable without letting them dry out.
Also, if you live in a humid city, chances are the upper roots will never dry out.
What’s Next
Now, that you are aware of the different steps to grow high-quality hydroponic lettuce through the plastic bottle hydroponic lettuce cultivation process it is time to practically implement it.
In case, you need any help in growing high-quality hydroponic lettuce please do let us know and we will be more than happy to assist you further.