by Nicole Baker: In today’s high stress, constantly moving, striving world, people are gravitating towards slowing down and finding practical solutions to help combat our modern lifestyle…
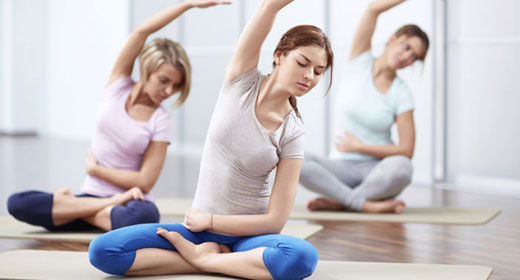
Exercise and meditation are both ways to manage stress, making yoga a solution to today’s sedentary technology-filled world. Gentle Yoga is a low-intensity restorative way of practicing yoga that is more focused on stretching the body and creating more balance.
Anyone can benefit from a Gentle Yoga practice. While some people may think it is for the elderly, there are plenty of people regardless of age or ability who can reap the benefits of a Gentle Yoga practice. This practice helps relieve stress, increase flexibility, and enhance the range of motion of the practitioner. It is an excellent form of exercise and meditation to pair with cross-training or create more balance for those who tend to gravitate towards more vigorous yoga practices.
When getting started with a Gentle Yoga practice, one of the main tips to consider is to avoid striving. Rather than trying to get somewhere with the pose, try to dive into how the pose feels and what you can do to make it more comfortable to practice each posture longer. This often involves starting slowly and not coming into your full expression of your posture immediately. Settle into the pose and see if you can soften naturally.
Props like yoga bolsters and blocks can be supportive to a Gentle Yoga practice. By using props, you are able to hold the pose for longer periods of time without putting strain on the body. They also make the yoga practice a more relaxing experience.
A Gentle Yoga Sequence
We have created a Gentle Yoga sequence that anyone can do. Keep in mind that this is your practice. While we have incorporated time frames for each pose, this is not something that needs to be adhered to. Practice for as long as you like and do what feels right for you. It can be helpful to have props such yoga blocks, a yoga strap, blanket, or a yoga bolster.
Sukhasana — Easy Seated Pose
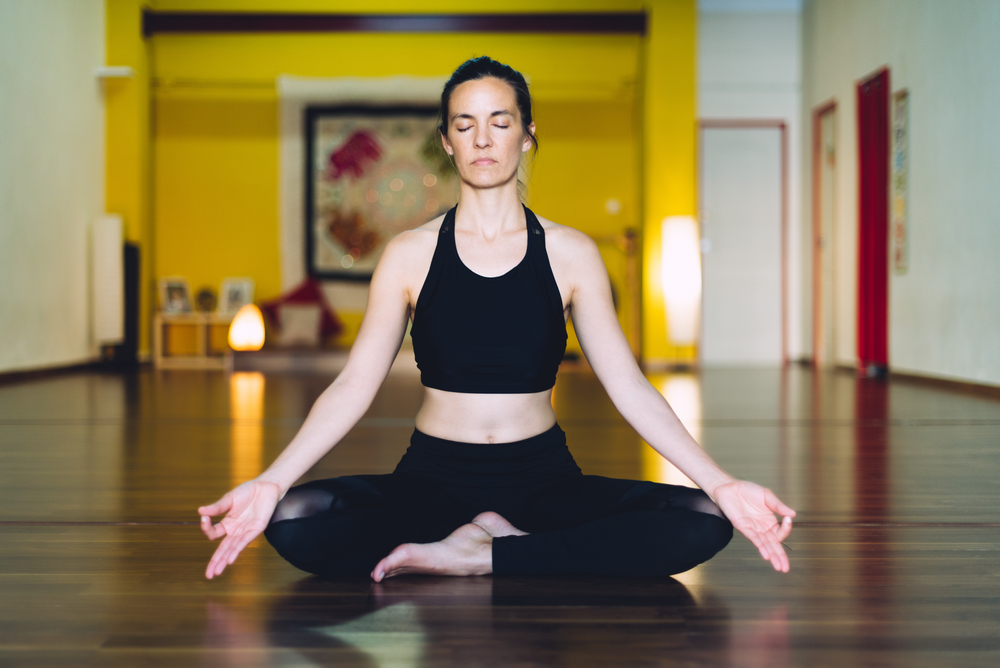
Sukhasana or Easy Seated Pose looks simple enough but it is a foundational posture for seated yoga postures. It is a good idea to spend some time focusing on your alignment and understand how this posture is more than just sitting there with your ankles crossed.
To practice Sukhasana, start seated and cross the ankles. The pelvis should be in a neutral position, not tipping forwards or backwards. Root down into the sit bones and lift through the crown of the head. The navel should come in towards the spine while the ribcage is lifting. Let the chin bow softly or stay parallel to the floor. Practice for as long as you like. This can be an excellent place to settle into your breathing patterns and spend time transitioning from the doing mode to the being mode.
If Sukhasana is too challenging, try sitting on top of yoga blocks, a bolster, or even thick books to help release tension in the hips and knees.
Joint-freeing Exercises
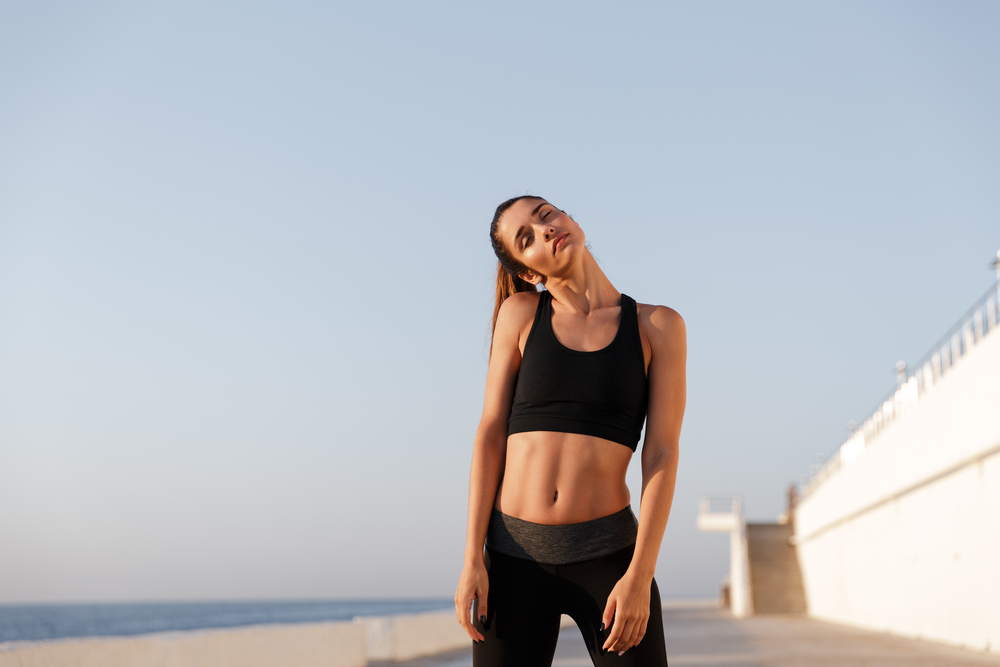
Joint-freeing exercises help warm up the body while increasing mobility in the joints. These are simple exercises to incorporate into a Gentle Yoga sequence that can have a big impact, especially for those who have joint issues such as arthritis. They also bring in a little movement into a practice that may seem slow and still. Here are a few joint-freeing exercises you can practice from Sukhasana:
- Neck rolls: Maintain the posture of Sukhasana but bring the chin down to the chest. Start with half circles by moving the right ear towards the right shoulder, then chin back towards the chest, and then left ear to the left shoulder. Continue rolling the neck back and forth and if it is comfortable take full circles with the neck. Practice for around ten breaths.
- Shoulder Rolls: Readjust Easy Seated Pose and cross the opposite ankle in front to help maintain balance in the body. Lift the shoulders up to the ears and make small circles forward for ten rounds. Repeat by taking the circles backward for ten rounds.
- Wrist Circles: In today’s modern age of being behind a computer and holding mobile phones all day, wrist circles can help maintain healthy wrists. Simply bend your elbows, make a small fist, and take ten circles forward, then ten circles back.
- Torso Circles: In Sukhasana, bring the hands to the knees. Using slow movements, fold forward at the waist and circle your torso. It is okay to move the hips. Move fluidly with ease for ten circles and then repeat in the opposite direction.
- Ankle Pumps: Ankle pumps not only increase mobility and flexibility in the ankles but stretch the calves. Extend your legs outward in Staff Pose (Dandasana) and point your toes as far forward as you can. Then flex the ankles so the toes come towards you. Practice for ten to 15 breaths.
Janu Sirsasana — Head to Knee Forward Bend Pose
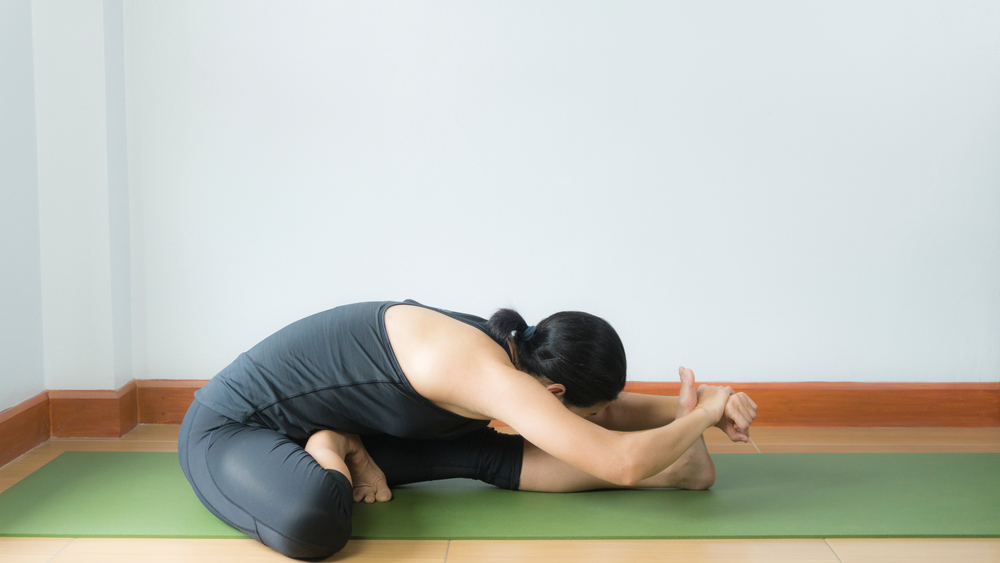
Janu Sirasana is a yoga posture anyone can do that stretches the back, hamstrings, and shoulders while relieving anxiety, fatigue, headaches, and menstrual discomfort.
With the legs still extended, readjust your posture so the pelvis is neutral and the back is elongated. The sole of the right foot comes in towards the left thigh while the right knee bends and rotates down toward the floor. Keep the glutes firmly against the floor. While the chest remains open fold forward at the waist. Once you have reached your limit, you can reach the hands forward. However, make sure the arms at the last step as it’s more important to focus on the movement coming from the waist.
Hold for ten to twenty breaths before repeating on the opposite side.
If you have any knee issues or notice that this is too tight anywhere in the body, take a modification. Roll up a thin blanket or a yoga mat and place it underneath the knee on the extended leg. You can also sit on top of a folded up blanket if you would like more height to decrease tension in the hips.
Upavistha Konasana — Seated Wide-Legged Straddle Pose
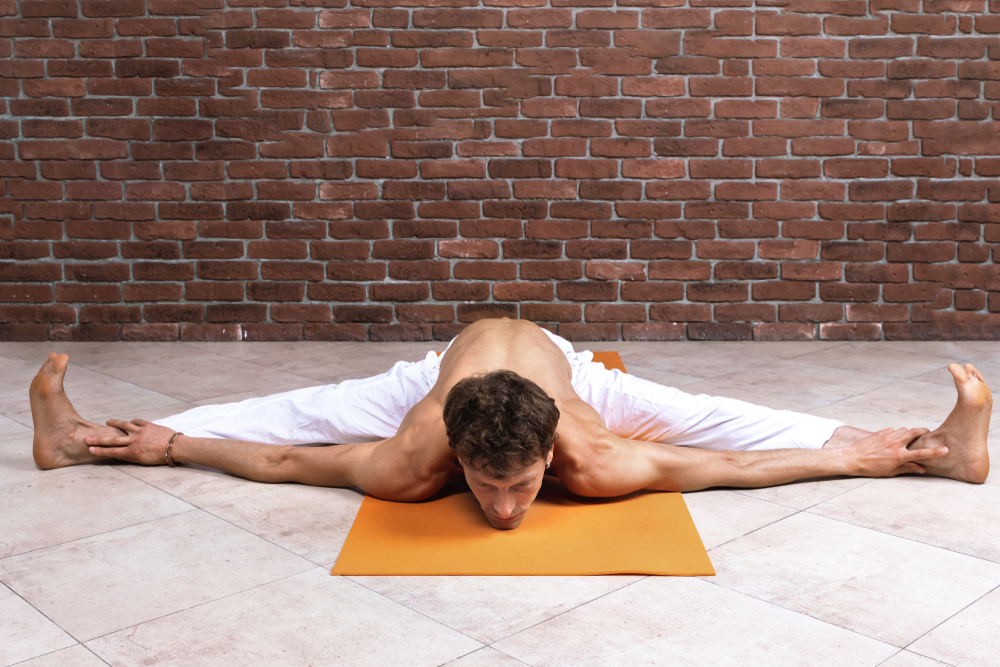
To stretch the legs, practice Upavistha Konasana. This is an excellent posture to support a healthy lower back as it stretches the backs of the legs. When hamstrings are tight from activities like sitting down on a regular basis, the lower back often overcompensates at also tightens creating lower back pain.
Come back into Dandasana. Maintaining the same principles of Sukhasana, take both feet out as wide as possible. Do your best to keep your legs straight. While keeping the sits bones pressed into the floor begin to fold forward at the waist. Focus on trying to bring the abdomen and chest to the floor versus trying to reach the arms as far forward as you can. Practice for ten to twenty breaths.
If you need any additional support to hold the posture, you can place a yoga bolster or yoga blocks underneath the torso or arms. If it is simply not possible to keep the legs straight, roll up to small towels to place underneath the knees.
Parivrtta Janu Sirsasana — Revolved Head to Knee Pose
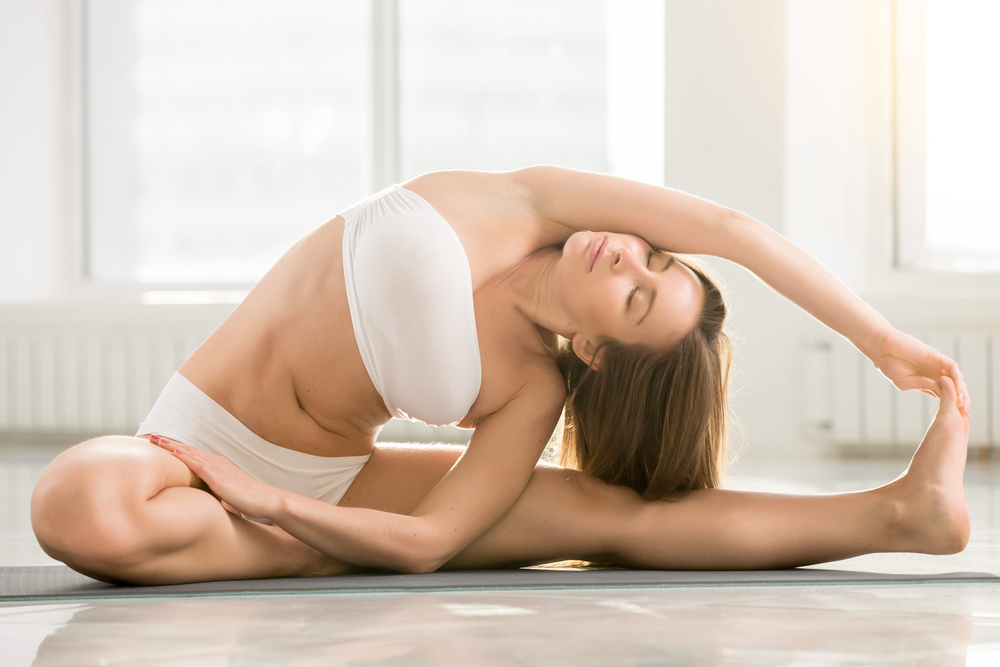
Create a balanced Gentle Yoga sequence by stretching the side body. Parivrtta Janu Sirsasana stretches the hamstrings, groin, and shoulders while releasing tension in the side of the upper body and rib cage.
From Upavistha Konasana bend the right knee and bring the sole of the right foot towards the groin area. Lift the ribcage up and extend the right arm towards the sky. Reach for the left foot, ankle, or calf with the left hand while bending in the side body. The right arm remains extended. Keep the glutes grounded towards the floor and hold for 15 breaths before practicing on the opposite side.
Like Upavistha Konasana, if this is too difficult on the legs, you can keep a rolled-up towel, yoga mat, or blanket underneath the extended leg.
Ardha Matsyendrasana — Half Lord of the Fishes Pose
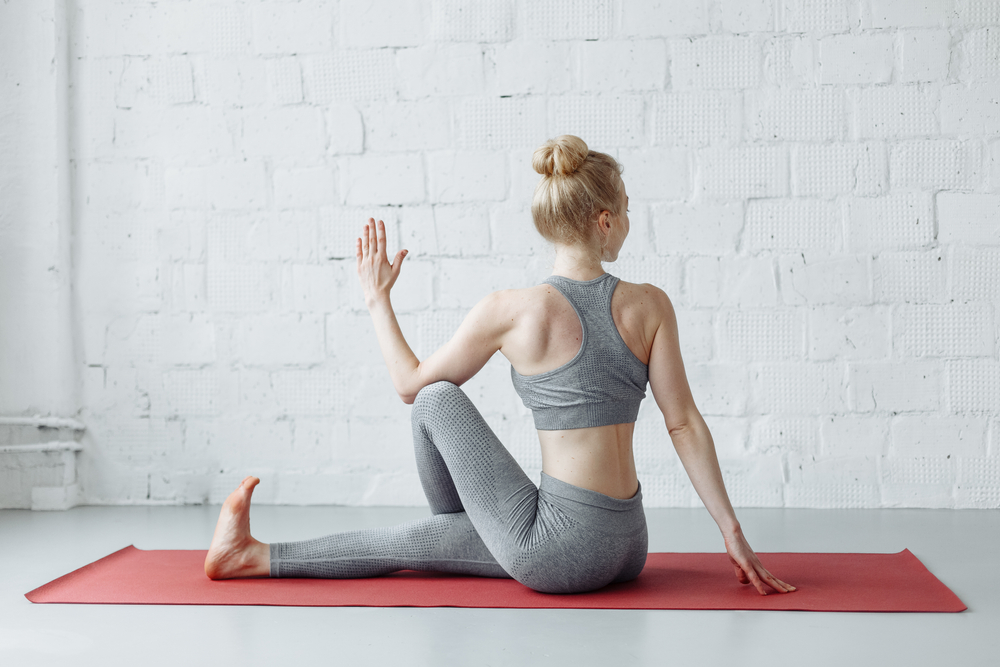
To help increase mobility in the spine, incorporate Ardha Matsyendrasana into your practice. This twisty yet accessible posture helps stretch the back, side body, and neck. While our body is used to bending forward and backward, this seated twist can help move the body in ways it’s not used to help stay mobile and reduce chronic pain.
Start from Dandasana. Bend both knees with the soles of your feet on the ground. Move the right foot underneath the left leg towards the outside of the right glute. Extend your right arm and spine upward and rotate towards the left. You can lower the right arms so it is either hugging the left knee towards the chest or bend the right elbow and place it on the outside of the left thigh. Gaze over the left shoulder. Hold for approximately ten breaths.
If this is challenging on the legs or knees, keep the bottom leg extended instead of bent. You can also sit on top of yoga blocks to help create more space for the legs.
Supta Baddha Konasana — Reclining Bound Angle Pose
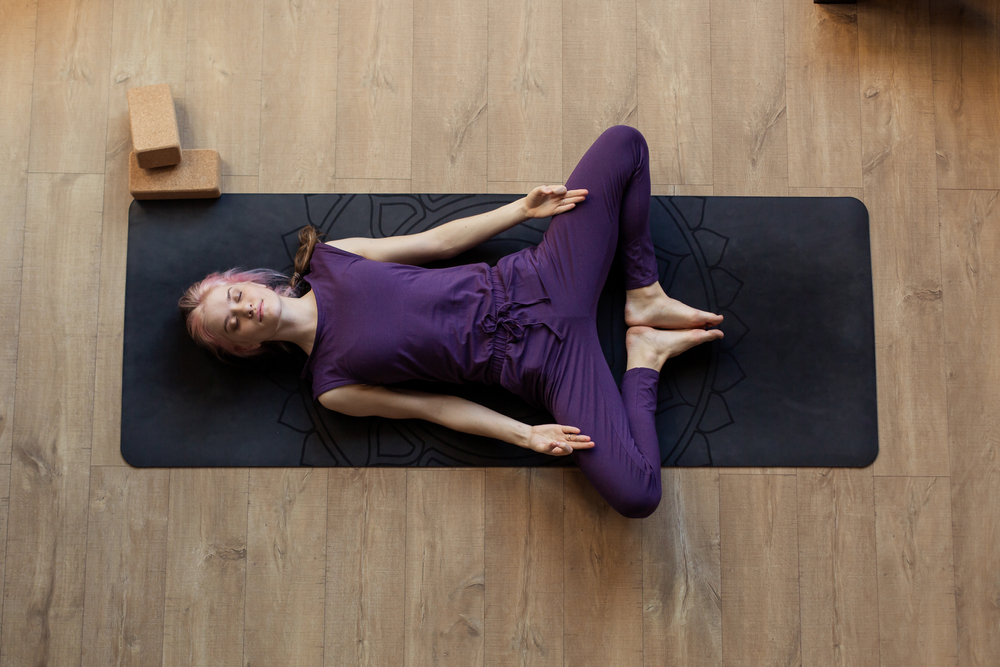
As you begin to settle down into more grounding poses of this sequence, Supta Baddha Konasana can help stretch the lower body while getting a sense of stability against the floor.
Start by lying down on your back. Bend the knees and bring your feet towards your glutes. Keep the knees bent and release each knee to its respective side while you bring the soles of the feet together.
For extra support on Supta Baddha Konasana, you can place yoga blocks or any other support underneath the outsides of the thighs.
Ananda Balasana — Happy Baby Pose
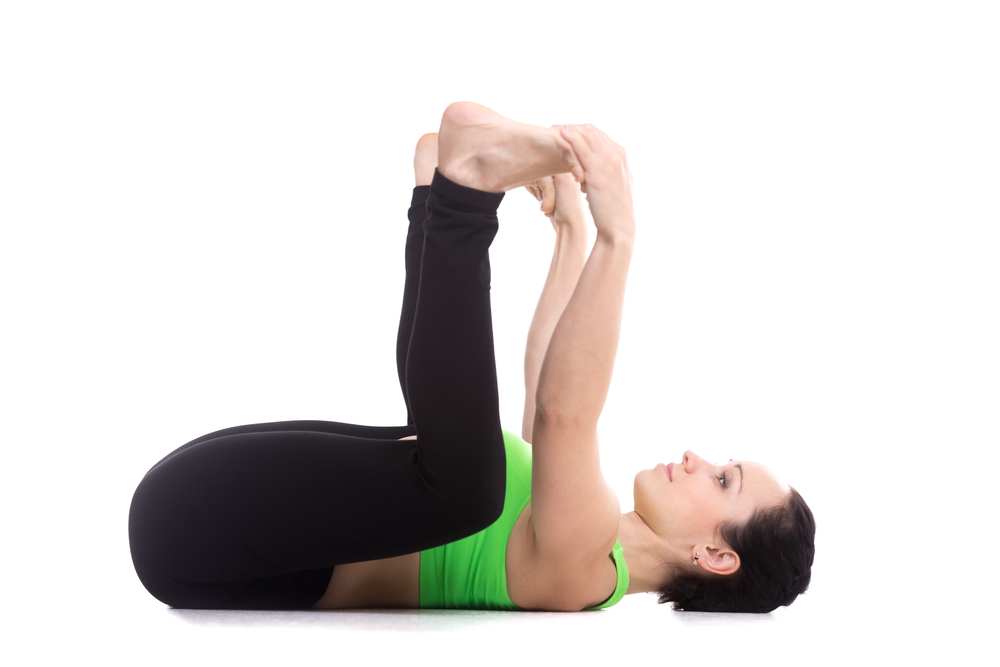
Hip openers are often known for being intense but they don’t have to be. Ananda Balasana, a posture often seen in both Gentle and more vigorous yoga practices is a gentle way to open the hips while stretching the back.
After practicing Supta Baddha Konasana, bring your knees towards your chest for a few moments. Then separate the knees so they are near the outside of the rib cage. Lift the soles of the feet towards the sky. However, make sure to keep the knees bent and keep the feet as wide as the knees. Reach for the feet, ankles, or calves with your hands and gently press down. The knees should be getting closer to the floor.
If it’s difficult to touch your feet or reach for the calves try using a yoga strap or a substitute like a scarf or a belt. Instead of reaching for your feet with your hands, take the strap around the arches of both feet. Reach for each side of the strap with your hands and gently pull on the strap to bring the knees closer to the floor.
Savasana — Corpse
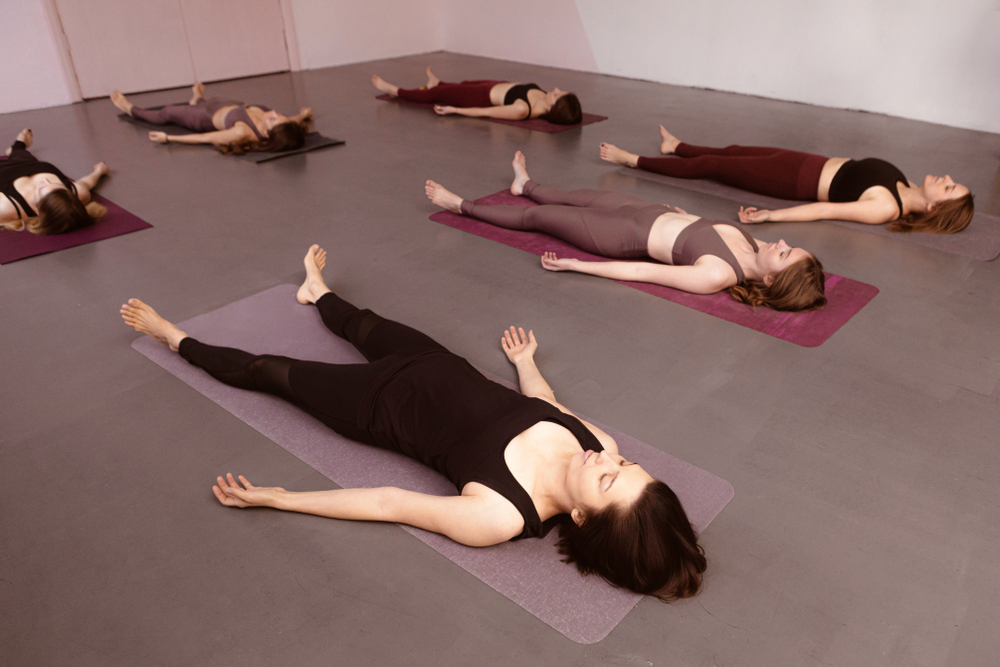
No yoga practice is complete without a Savasana to end the practice. Savasana is important because it helps integrate the practice.
Lie down on your back and let your arms release to the side of your body. The feet can relax outward. The whole body can soften, reducing any effort to contract or engage the muscles. Let the body and breath settle down and notice the body lying on the mat. Without falling asleep, take time to relax. Rest here for as long as you would like. It can be helpful to start a timer for this portion of the yoga practice.
If you need additional support, a bolster, pillow, or rolled-up blanket underneath the knees can help relieve pressure from the back. A blanket can provide warmth if you’re feeling cold or a yoga block underneath the head can help support the neck.
Practicing Gentle Yoga may feel strange at first– even boring. However, once your mind and body adapt to this slow yet effective way of taking care of your mind and body, you can create a regular practice. By practicing gentle yoga more often, you can indulge in the benefits of moving slower to help combat our modern stressors.


