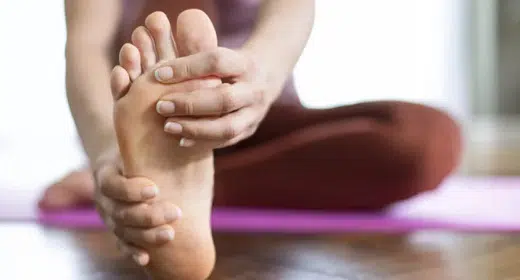
by Julie Peters: Sore, achy feet affect your mood, not to mention cause pain to radiate to other areas of the body. Find relief for your feet by practicing yoga for sore feet…
Sore, achy feet can affect everything from hip pain to lower back pain to posture issues—not to mention mood. Opening and strengthening the feet and ankles can help with pain and discomfort all over the body. Here are some yoga practices you can do to soothe and treat sore feet.
We stand and walk on our feet all day, but we don’t always think about how important they are to our health. We have many fine bones and complex tendons and muscle structures designed to allow our feet to move flexibly across varying types of surfaces, balancing our weight in all kinds of different ways. If your feet are sore, it’s long past time to pay attention to them!
Here are some yoga practices for sore feet that may help soothe and ease your feet.
As always, check with your health practitioner if you have any health concerns before starting a yoga practice, and don’t do anything that hurts or feels unsafe.
Elevate
Lie on your back and elevate your legs. You can swing your legs up a wall or simply extend them into the air. You may like to place a cushion or pillow under your lower back to make this feel a little more comfortable. Please note this pose is not recommended for people who are pregnant, have high blood pressure, or have had recent eye surgery.
Circle the ankles gently in one direction and then the other. If you like, extend your arms up as well and do the same movements with your hands to give your wrists a stretch.
Then point and flex the feet alternately. Try to gently flare the toes open and then squeeze them together (avoiding any feelings of cramping). Repeat ten times.
Massage the Feet
For this yoga exercise for sore feet, you’ll need a dowel, a golf ball, or a similarly hard prop that you can roll on the ground. If you have inflammation in your feet, you may wish to check with your doctor before you try this one. This one may be practiced a few times a week, but not daily.
Stand comfortably and then step one foot onto the prop. Roll your foot over the prop, leaning enough of your weight down that it is a bit uncomfortable (but you’re not in screaming pain). Roll along the inner arches, the outer arches, the medial arch (under the ball of your foot), and your heel. After a few minutes, find that place in your foot that is extra tender, like a knot that you would have in your back or shoulder, and lean some weight into that place. Breathe five to ten deep breaths and try to relax your foot over the pressure of the prop.
When you are finished, step off the prop and shake out your foot. Stretch the toes, flex, and point. Feel the difference in your two feet on the floor. Look at them to see if they look any different. Then repeat on the second side.
Monkey Toes
This is a particularly useful exercise if you have fallen arches or bunions, but it’s great for everyone. It takes some practice to get the hang of it, but working on your foot dexterity can help correct misalignments, lessen knee, hip, and lower back pain, and improve balance. Be patient—for most people nothing happens the first time you try this. It’s partly an exercise for your brain to connect to your toes, so give it time.
From standing, lift all ten of your toes up off the ground. Spread them apart as far as you can, and then relax them back down. If they won’t spread, try spreading your fingers apart at the same time—sometimes the feet can learn from the fingers. Repeat five times.
Next, lift your toes again, and see if you can place down just your big toe, keeping the other toes lifted. Then place all your toes down and see if you can lift just your big toe, keeping the other toes down. Repeat three times.
Once you’ve got that mastered (and that might take a few weeks of daily practice), try the next exercise. Lift all ten of your toes, and then see if you can place down just the big toes and the baby toes. Repeat three times.
Finally (and this exercise may be the most difficult) place all your toes down, and then lift just the big toes and the baby toes.
Toe Pose
This yoga pose for sore feet stretches out your toes and arches. Start on hands and knees, and tuck your toes under. Sit back on your heels. This may be enough: Press forward on the floor with your hands to get a stretch. If you’re feeling good, sit back on your feet with your toes tucked under. You may find you like your feet straight back behind you in line with your knees, or you may prefer your big toes together and your knees wider apart depending on your particular anatomy. Avoid any knee pain in this position; you may prefer standing on your knees.
Start with five deep breaths here, and slowly work up your amount of time to a few minutes. This pose is often very uncomfortable at first, but it becomes easier with time and practice.
Egyptian Walk
This exercise is great for balance and ankle strength, especially if you’ve had ankle sprains or strains in the past.
Stand at the back of your yoga mat, and step your right foot forward about a foot, like a short walking stride. Turn your palms up beside you with your elbows bent, like you are holding a tray in each hand. Lift up your heels as you inhale, and keep them lifted. Bend your knees as you exhale, lowering down with your back straight as if it were against a wall. If your knees feel fine, you can go all the way down until one knee touches or almost touches the floor. If you have any knee pain at all, just go down as far as you comfortably can.
On your next inhale, stand back up, keeping your heels lifted the whole time. On your next exhale, slowly lower your heels down.
Now step your left foot forward and repeat the sequence. Slowly walk to the front of your mat this way.


