If you want to increase your flexibility, look no further than yoga…
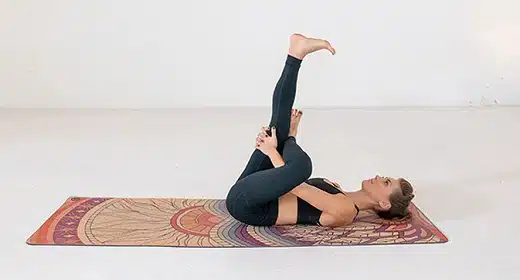 There are many physical benefits of a consistent yoga practice, and gaining flexibility is at the top of that list!
The practice of yoga as a whole works wonders for your body’s flexibility and mobility. When we think about what it means to be flexible, many of us immediately picture the splits.
But advanced yoga poses aside, flexibility means creating more space and length in the body by targeting your major muscles, joints and tissues and also increasing your overall range of motion in the joints.
Pro Tip: Sun Salutations are a great way to warm up your body and prepare for your yoga practice.
Read on to discover 8 awesome yoga poses for flexibility.
Feeling this look? Scroll to the bottom of the article to shop it. 💁🏻♀️
Practice These 8 Yoga Poses to Increase Flexibility:
Remember: the secret ingredient to increase your flexibility is consistent practice and holding each yoga pose for several deep breaths.
1. Standing Forward Fold (Uttanasana)
One of the most simple and straight forward (pun intended) stretches you can do to increase your flexibility is a Standing Forward Fold. This can be done with feet together or hip-width distance apart.
Experiment with these different variations to see what gives you the best stretch. Also don’t be afraid to incorporate a yoga block or two to help bring the ground up to you.
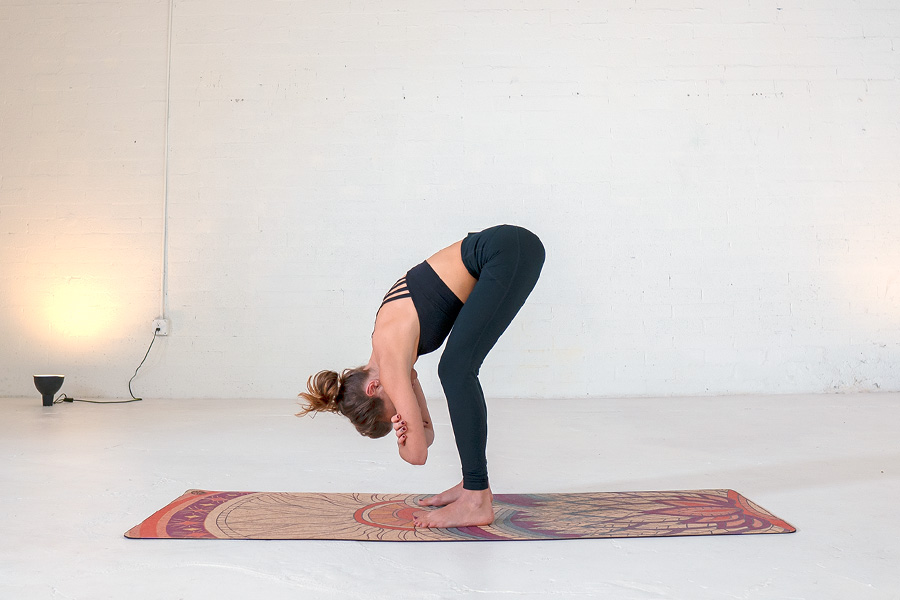
Let’s Try It:
- Start standing with your feet hip-distance apart and hands on your hips
- Microbend your knees and hinge forward slowly
- Allow your head to hang heavy. Your arms can relax towards the mat (let them hang heavy, or you can grab opposite elbows)
- Stay here for at least five deep breaths
- When you’re done, slowly roll all the way up to standing
2. Wide Legged Forward Fold (Prasarita Padottanasana)
Similar to #1 but a slightly different stretch, a Wide Leg Forward Fold takes your stance four feet apart. This yoga pose stretches – and can also strengthen – your hamstrings, calves, hips, low back and spinal column.
The key is to enter this pose mindfully, hinging from your hips as opposed to rounding your spine, and maintaining control and muscle engagement while you’re in it.
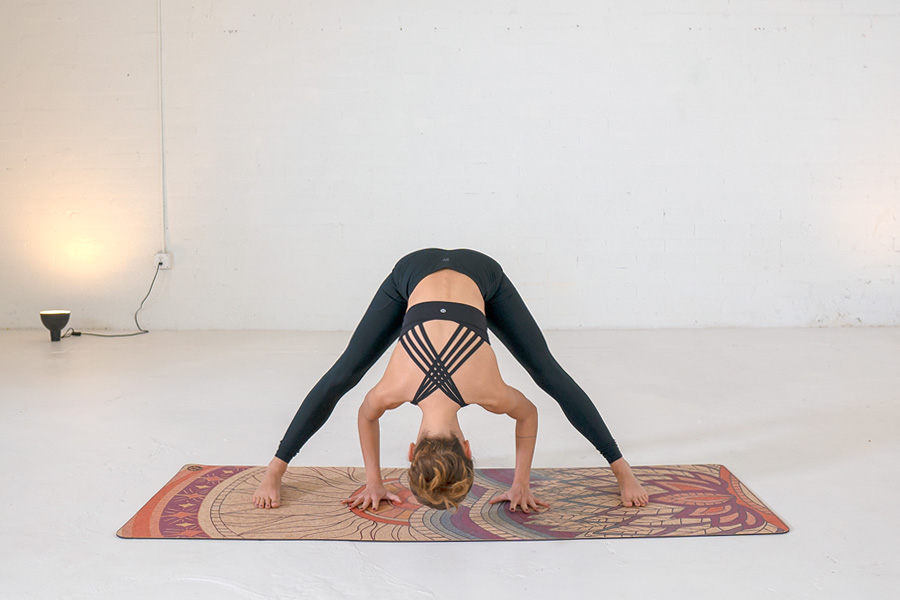
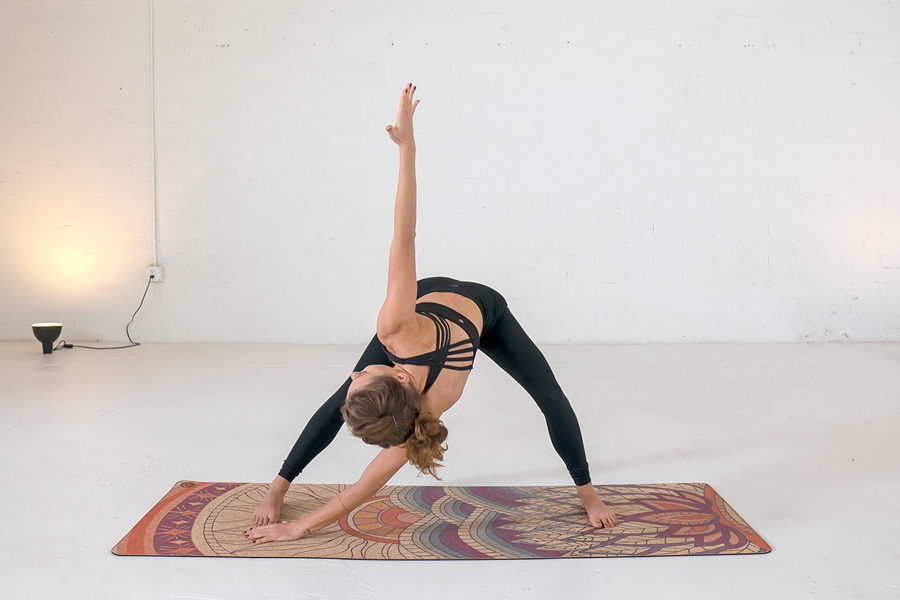
Let’s Try It:
- At the top of your mat, turn to either side and take a 4-foot step out
- Option to subtly turn your toes slight inward to prevent from slipping
- Hands to your hips as you begin to hinge forward, maintaining a long spine and keeping your core engaged as you lower
- Once you’re in the fold, your hands can relax to the mat beneath your shoulders, or they can grab your ankles or big toes
- Allow your head to hang heavy and breathe deeply
- Stay here for at least five deep breaths
- Option to add a bent knee twist: bend your right knee and plant your right palm in front your left foot. Reach your left arm skyward and stay for 3 breaths, then switch sides
- Come out of the pose the same way you came in: hands to hips and slowly rise with a flat back and strong core
3. Half Splits Pose (Ardha Hanumanasana)
Half Splits is – you guessed it – the more accessible version of full Splits Pose. Half Splits opens your hips, lengthens your hamstrings, and prepares your body for full Splits.
This yoga pose for flexibility is a great place for any level yogi to gain flexibility in the hamstrings – a place of tightness for many people.
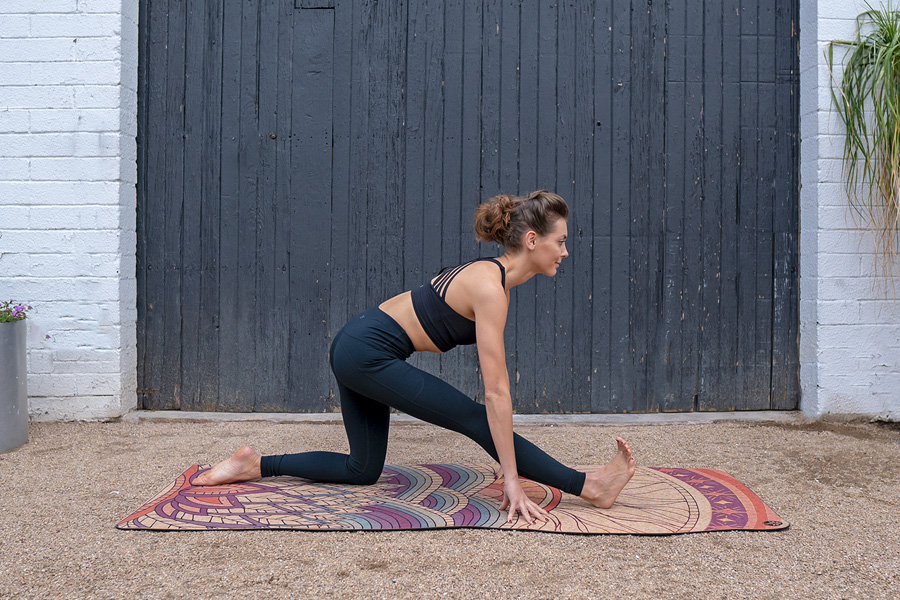
Let’s Try It:
- From Table Top position, plant your right foot between your palms
- Slowly straighten your right leg as you send your hips back
- Option one is to keep your hips lifted and stacked above your planted left knee
- Option two is to tuck your left toes and bring your seat to rest on your left heel
- Explore which option is better for your body, then flex your right toes back towards your face to keep your right leg active
- Stay here for five deep breaths, then switch sides
4. Lizard Pose (Utthan Pristhasana)
Lizard Pose is a beloved (and often challenging!) hip opening yoga pose. Lizard stretches your hamstrings, hip flexors, and quads, which makes it a great pose to prepare your body for more advanced poses.
Lizard Pose is a great way to get a deep stretch, and can be modified by using yoga blocks or a bolster beneath your hands or forearms for a more gentle variation.
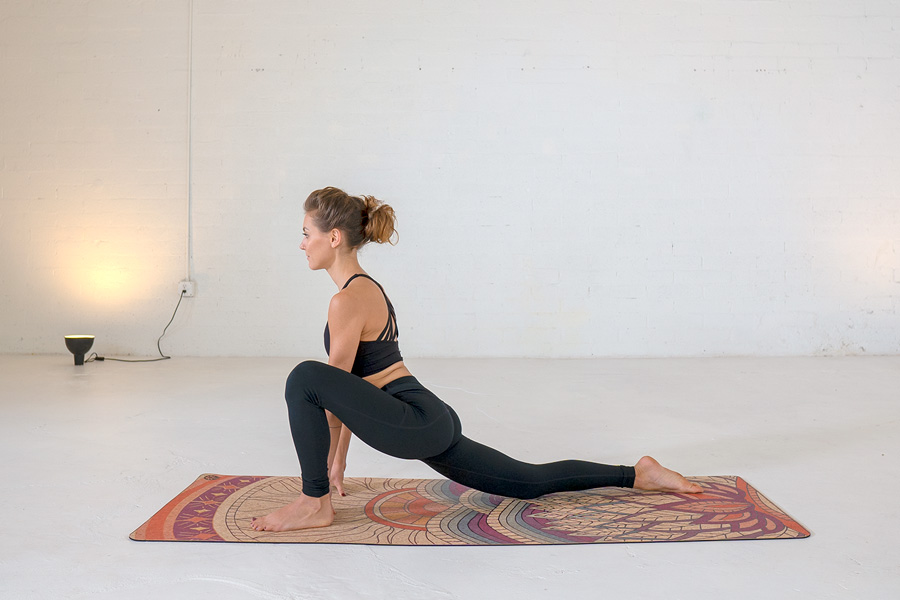

Let’s Try It:
- From a Table Top position, step your right foot to the outside of your right hand
- Keep both palms planted inside your right foot as you extend your left leg long behind you
- Option to stay on the palms keeping your chest lifted, or for a deeper stretch you can lower to your forearms (or onto blocks or a bolster)
- Stay here for five deep breaths, then switch sides
5. Pyramid Pose (Parsvottanasana)
A challenging yet rewarding yoga pose that targets the hips, hamstrings, shoulders and spine, Pyramid Pose is helpful in increasing your flexibility.
You can also modify this pose by placing a yoga block beneath each palm.
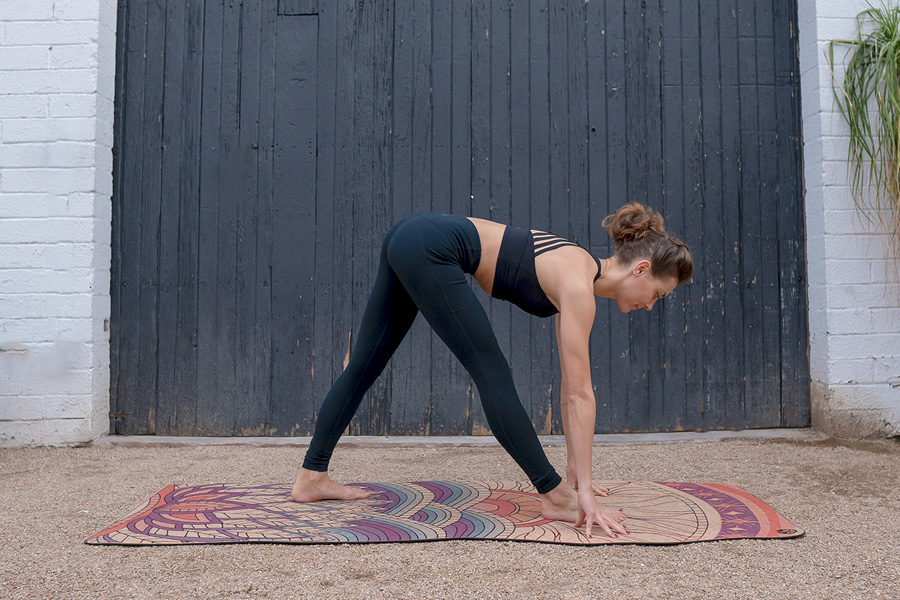
Let’s Try It:
- Start standing with your hands on your hips
- Take a three-foot step back with your right foot, then pivot your right heel down to the mat as you would in Warrior 1
- Square your hips to the front of the mat (gently pull your left hip back as you press your right hip forward)
- Inhale to lengthen your spine, and exhale to hinge from the hips with a flat back until you can’t lower any further
- Release hands to the mat or yoga blocks on either side of your front left foot
- Option to bend your front knee until your forehead can touch it
- Stay here for five deep breaths, then switch sides
6. Cow Face Pose (Gomukhasana)
This yoga pose for flexibility also tackles mobility in the shoulder and hip joints. In addition, Cow Face (more commonly referred to as Gomukhasana) opens the chest and stretches the arms, side body, thighs and ankles.
Talk about an all-in-one stretch! However, this pose can be challenging so it’s important to start slow and modify as much as you need to.
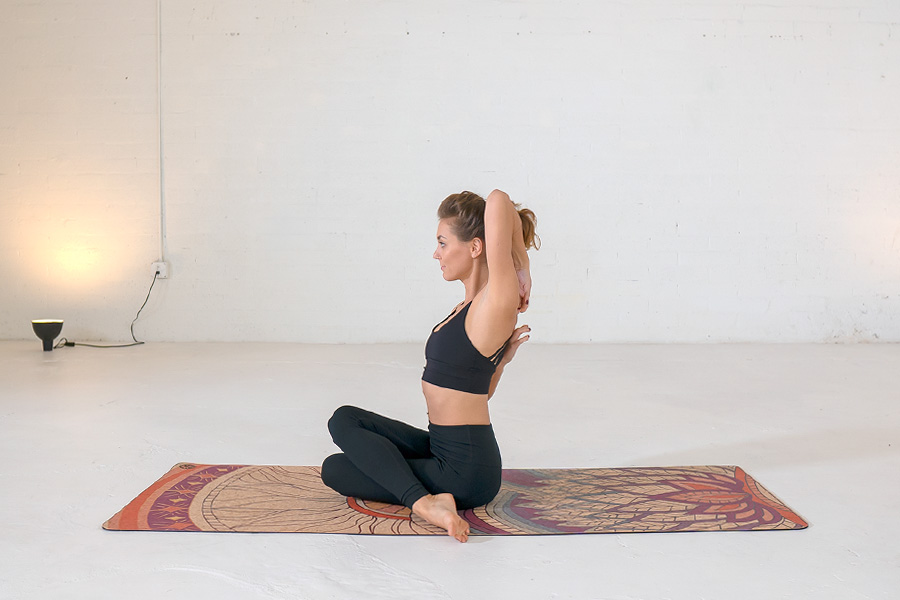
Let’s Try It:
- Start in a cross legged seated position (you can stay here or come back if the full expression is not accessible)
- Point your left kneecap towards the front of the mat and then stack your right knee on top, also pointing forward (if it’s too intense, go back to cross legged)
- Inhale to reach your arms overhead
- Exhale to bend your right elbow and reach your right fingers down towards your mat as you bend your left elbow and reach your left fingers up towards your right hand
- Pro Tip: If you don’t yet have the shoulder mobility needed for the final expression of clasping fingers behind your back, you can modify by grabbing onto a yoga strap or reaching for opposite elbows instead
- Use your inhale to lengthen your spine and shine your heart forward
- Use your exhale to soften your shoulders and hips, allowing yourself to relax into the pose
- Stay here for five deep breaths, then slowly release your arms, unwind and shake out your legs, and repeat on side two
7. Reclining Hand-to-Big-Toe Pose (Supta Padangusthasana)
Another great yoga pose for flexibility where a yoga strap can help you access a deeper, safer stretch. Big Toe Pose primarily targets the hamstrings but also stretches the calves, thighs and hips.
In this reclined variation, you’re able to relax your body and focus on the deep stretch as opposed to the standing variation that also requires balance and strength. This yoga pose is awesome for increasing flexibility.

Let’s Try It:
- Start lying on your back with your yoga strap nearby (if you choose to use one)
- Bend your right knee into your chest and grab onto your big toe with your peace sign fingers of your right hand. If you’re using a strap, hook it around the arch of your foot and hold the strap in your right hand
- Flex your left toes back towards your face – you want to keep your left leg engaged in order to keep you anchored to the mat
- Take a deep inhale, and on your exhale begin straightening into your right leg
- Depending on your flexibility, you may be able to straighten the leg entirely, or more commonly, you’ll need to keep a bend in your knee
- Stay here for five deep breaths, then switch sides
8. Reclined Figure 4 (Supta Eka Pada Utkatasana)
A more accessible counterpart to Pigeon Pose (Figure 4 is essentially Pigeon Pose on your back), this is a great hip opener! It also stretches the gluteal muscles and can help relieve low back pain.
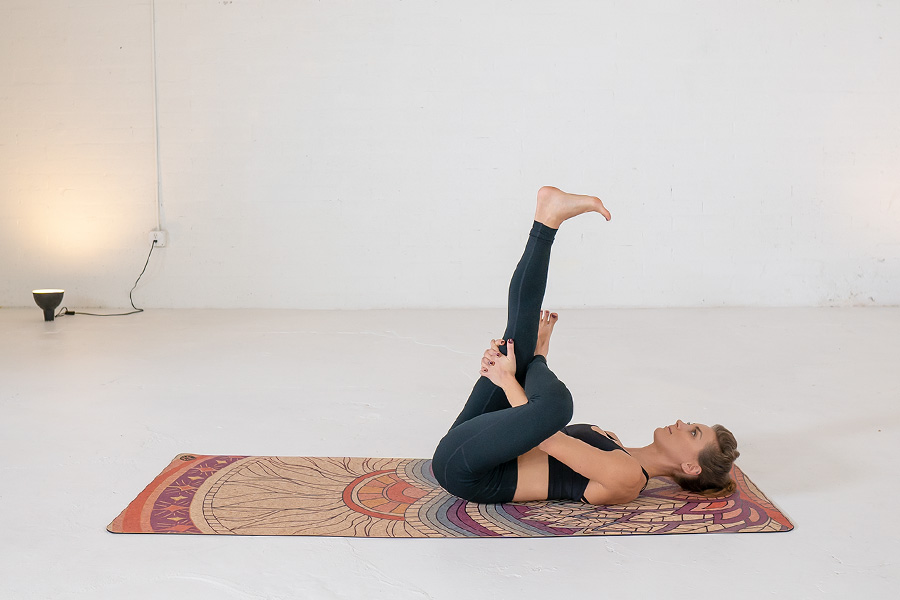
Let’s Try It:
- Lying on your back, hug both knees into your chest
- Keeping both feet flexed (important to protect your knee joints), place your right ankle on top of your left thigh
- Your legs will now make an upside down triangle shape – reach your right arm through and clasp your fingers behind your left thigh
- To deepen the stretch, gently press your right elbow against your right thigh. To back off, allow your legs to fall away from you
- Keep your feet flexed and breathe for five deep breaths, then switch sides
Practice Yoga for Flexibility! These Poses Will Help You Gain Flexibility AND Mobility
For all of these yoga poses, breath is key! Be sure to maintain consistent conscious breathing while you’re in each pose, and also as you transition between them.
When we breathe deeply and fully, we send the signal to our body that we’re safe. As a result, we’re able to access the stretch deeply and safely.
Remember to modify, and use yoga props!! Yoga props are your friend and can be an excellent aid in helping you increase flexibility.


