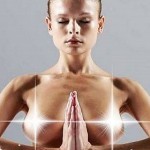


by Sara Schwartz: Get fit and de-stress with these basic yoga poses…
Find New Flexibility
 “Yoga is the greatest thing since sliced bread …and it’s [much] older than sliced bread,” says Clio Manuelian, yoga instructor at Equinox and various yoga studios in Los Angeles, CA. (In fact, archaeologists found evidence that people have been practicing yoga for more than 5,000 years!)
“As we age, our bodies tend to hunch and compress. Yoga is especially good for the over-50 crowd, because the breathing exercises help strengthen and expand the lungs, and the poses increase joint flexibility and a sense of vitality.”
The following slides explain the health benefits of six classic yoga poses, plus step-by-step instructions for doing them yourself.
Note: Do not attempt any exercises that are painful or that cause you to worry about your balance. Talk to your doctor before trying new exercises or movements.
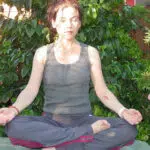
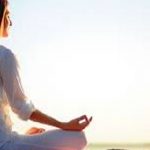
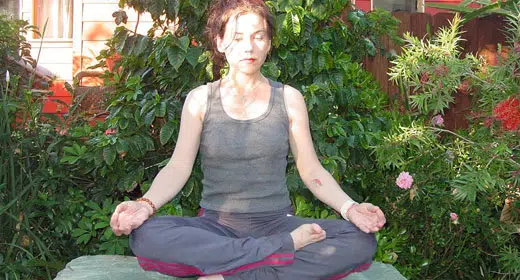
Yoga Breathing
 (Ujjayi) Learning how to breathe the yoga way is the first exercise Manuelian teaches students, whether they are over 50 or young children. The practice of taking slower, longer breaths oxygenates the blood and soothes anxious, distracted minds, she says. “It brings the systems back to balance… circulatory, respiratory, digestive—all of them. It also brings the mind back to the breath, a ‘right-now moment,’ again and again, and accepting the present is a wonderful tool to help us age gracefully.”
Basic steps for yoga breathing:1) Sit with your spine straight and your legs relaxed. You can do this in a chair, if it’s more comfortable. 2) Inhale and exhale gently and deeply, directing the inhalation and exhalation across the back of your throat to create a soft “hhhhaaa” sound (like the sound of waves on the beach or like a really gentle Darth Vader, for all you Star Wars fans). 3) Repeat breaths for 5 minutes.
Mountain Pose
 (Tadasana) This simple standing exercise is the blueprint for all other yoga poses, says Manuelian. Our increasingly sedentary lifestyles have led to hunched shoulders and curved backs — mountain pose is great for aligning the body, she explains. “It’s easier than meditating and creates a wonderful sense of stillness.”
Basic steps for mountain pose:1) Stand with your feet hip-distance apart and your hands down at your sides. 2) Rock gently back and forth, fanning out your toes, to make sure your weight is evenly distributed along both feet and then plant them firmly on the floor. 3) Raise your head, so you are looking straight ahead, and then lengthen your back and neck towards the sky, thinking of a string attached to your head pulling upwards. Keep your chest raised up and out, but not puffed or rigid. 4) Take 10 to 20 breaths in this position. Relax.
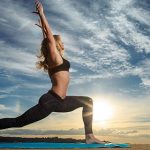
Crescent Pose
 (Anjaneyasana) Great for stretching the legs, groin, and hip flexors, this lunge pose also strengthens the thighs, butt, lower belly, and other core muscles. According to Manuelian, crescent pose can also alleviate symptoms of plantar fasciitis, a painful inflammation of the tissue that connects the heel bone to the toes.
Basic steps for crescent pose:1) Stand with your feet together, toes forward. 2) Bend forward at the hips until you touch the ground—feel free to bend your knees if you need to. 3) Bracing your arms and upper body on the floor with your fingertips, step your right foot back into a lunge, leg straight out, and bend your left knee so that your left calf is at a 90-degree angle with your left thigh. Your weight should be distributed between your firmly planted left foot and the ball of your right foot. 4) From the lunge, inhale and raise your arms straight above your head while looking forward and keeping your head straight. Exhale slowly. 5) Repeat breaths and hold pose for up to 1 minute.Make this pose easier: Start by standing arms-length from a wall with your feet together. Step the left foot back into a lunge and keep the left heel lifted. Place both hands on the wall in front of you. Bend the right knee deeply (maybe 90 degrees, maybe not). If you’re feeling balanced and strong, explore lifting yours arms up along side your ears.
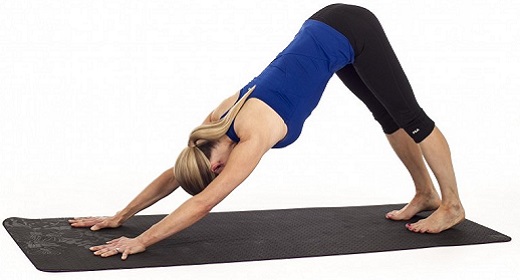
Downward-Facing Dog
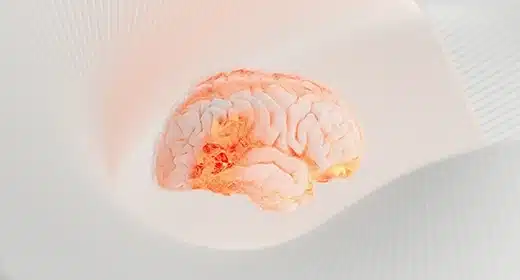
 (Adho Mukha Svanasana) Known as a rejuvenating pose, downward dog lengthens the spine, stretches the chest and hamstrings, and strengthens the arms. Manuelian recommends this pose for women especially, because it’s weight-bearing and therefore promotes bone density and fights osteoporosis. Plus, this pose is a mild inversion, which brings fresh oxygen and blood to the brain.Note: People who have high blood pressure, glaucoma, or an ear infection, or have suffered a stroke should not attempt this pose.
Basic steps for downward-facing dog pose: 1) Start on your hands and knees, arms should-width apart and legs hip-width apart. (If supporting yourself on hands and knees is uncomfortable or if your joints don’t allow this pose, see the “Puppy Dog” variation below.) 2) Plant your hands on the floor, fingers spread. Curl your toes under, like you’re getting ready to stand up. 3) Straighten your legs and stretch your arms forward, keeping elbows straight and shoulders down, to create a 70-degree angle with your body. Keep your head aligned with your arms and back, not hanging and not raised. 4) With an exhalation, raise your rear up, and push your thighs back and your heels to the ground—you should feel your calf muscles stretch, but make sure not to lock your knees straight. Concentrate on lifting your pelvis and rear end to the sky and pressing down evenly on your heels and palms. 5) Throughout the pose, focus on firming the outer muscles of your arms and the inner muscles of your legs. 6) Hold this pose for 1 minute. Return to hands and knees and relax. Make this pose easier by doing the “Downward-Facing Puppy Dog”: Start standing with your feet hip-distance apart, arms-length away from the back of a sturdy chair or table. Place hands on the chair or table, instead of the floor, then follow the rest of the steps. Once the back of a chair or table is too easy, work your way to putting hands on the seat of a chair and finally onto the floor.
Triangle Pose
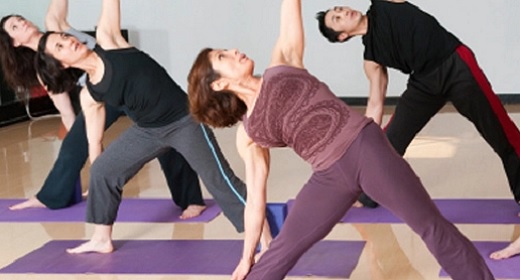
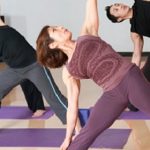
 (Trikonasana) Triangle pose is great for stretching your hamstrings, hips, and spine. To help you keep your balance and align your body properly, try doing this pose with your back against a wall.
Basic steps for triangle pose:1) Start in mountain pose and then step one leg out to the side until feet are three to four feet apart, toes facing forward. Raise your arms so that they are parallel to the floor, stabilizing you. 2) Turn your left foot slightly to the right and turn your right foot 90 degrees, so that it faces directly right. Turn your right thigh out and make sure your right kneecap is aligned directly toward the center of your right ankle. 3) Exhale and bend your torso at the hip to the right, reaching down with your right hand to rest it on your right toes (or ankle) to balance yourself. 4) Focus on opening up your torso to the front and stabilizing your body by firming your leg muscles and pushing your heels into the floor. 5) Inhale and exhale slowly and hold the pose for 30 seconds to 1 minute. Straighten back to mountain pose and repeat, this time leaning over the left leg. Make this pose more challenging: Once you have stabilized in the triangle pose, reach your left arm up toward the sky and turning your head so that you gaze up at your left hand.
Bridge Pose
 (Setu Bandha Sarvangasana) Bridge pose strengthens the entire back of the body, including the calves, hamstrings, glutes, and back. This gentle inversion also opens the chest and shoulders, which Manuelian finds particularly helpful in counteracting the effects of sitting hunched all day, be it in a car, at a desk, or at a dining table. Concave shoulders and chests begone!
Basic steps for bridge pose: 1) Lie on your back on the floor. If you don’t have a yoga mat, place a folded up towel or blanket underneath your shoulders to protect your neck and head. 2) Bend your knees and move your feet as close to your rear as is comfortable, keeping your feet flat on the floor and hip-distance apart. 3) Rest your arms on the floor, exhale, and press your weight into your feet to lift your hips and glutes up towards the sky. Engage the muscles in your legs, keeping your feet and thighs parallel, to lift your body up so that only the tops of your shoulders are supported on the floor. 4) Make sure your knees remain behind the line of your toes, lift your chin away from your chest, keep your arms firm, and broaden your shoulder blades as much as is comfortable. 5) Inhale and exhale slowly and hold the pose for 30 seconds to 1 minute. Exhale and release the pose, rolling your body gently to the floor from the top of your spine down.