by Mina Sinai: Unlike other popular forms of yoga, Kundalini Yoga combines deep breathing, stretching, common postures and meditation all in to one practice…
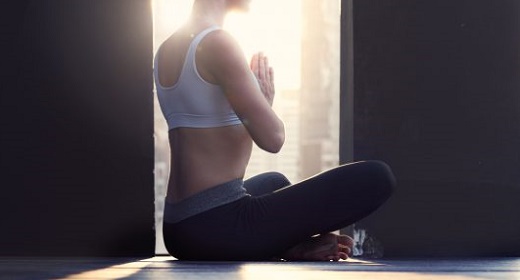
This ancient form of yoga can help yogis become more aware of themselves, their body and the world around them. Ready to hit the mat and learn Kundalini? Here are 15 poses to start:
1. Child’s Pose
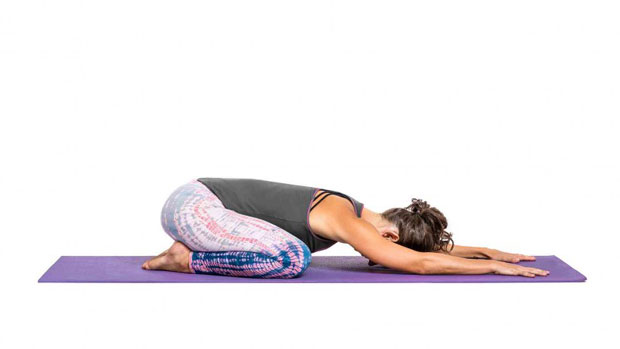 During child’s pose, yogis are asked to take time to reflect on their practice and focus on themselves. This is the pose where yogis can get in touch with their innermost self and set their intention for the rest of the practice.
Perfect your pose:
- Start on your hands and knees, with knees either spread wide apart or kept touching, depending on the flexibility of your hips. Either way, keep your big toes touching.
- As you take a deep inhale, pull your spine upward to lengthen the torso and elongate the abdomen. Bow forward on the exhale.
- Come forward until your chest is resting comfortable between your thighs, or on top of them if you chose to keep your knees together.
- Bring your arms on either side of you, with palms facing up, and hands resting by your feet.
- Hold this pose for about a minute before releasing. Let your body melt into the serenity and peacefulness of this pose.
2. Frog Pose
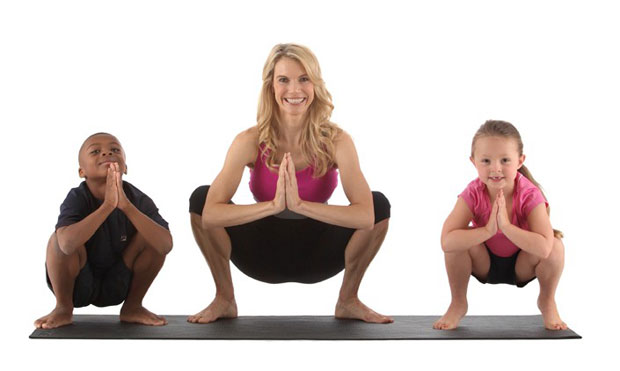
The frog pose, not as common as other Kundalini postures, is used to open the hips and stretch the inner thighs. Yogis who practice Kundaini use this pose to push themselves to their flexibility limits and breathe deeply through uncomfortable strains.
Perfect your pose:
- Begin in tabletop position and slowly move each knee out to about the width of your mat.
- Make sure ankles are in line with your knee, and turn the left foot out to the left, right foot to the right.
- Drop your upper body down to be supported by your forearms.
- While taking deep breaths, push your hips slowly and gently towards the back wall until you feel a strain.
- Hold this pose for 30 seconds to one minute before releasing.
3. Camel Pose
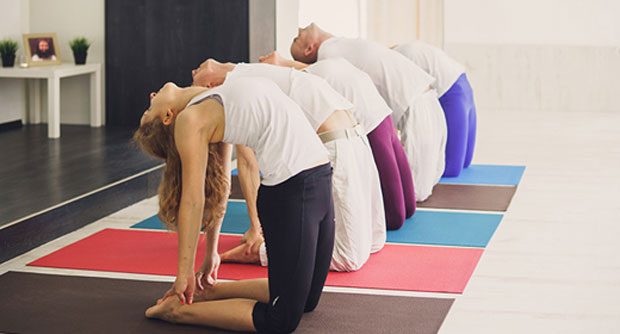
The camel pose is one of the best chest-opening postures in the Kundalini Yoga practice. For those yogis who are not as flexible, be sure to stop yourself from bending too far backwards by pausing whenever there is strain.
Perfect your pose:
- Begin in tabletop position and lift your body straight up off of the floor so you are only being supported by your knees and shins.
- Place both hands on the lower back with fingertips pointing downwards.
- Using a deep breath, pull the torso up to lengthen the spine and open the chest.
- Exhale and push the hips slightly forward, allowing the weight to move more into your hands.
- As your back begins to bend, carefully move one hand at a time down to each foot.
- Grab each heel tight and continue to gently push the hips forward, creating a deeper back bend.
- Hold for 30 seconds to one minute before carefully releasing from this pose.
4. Downward Dog Pose
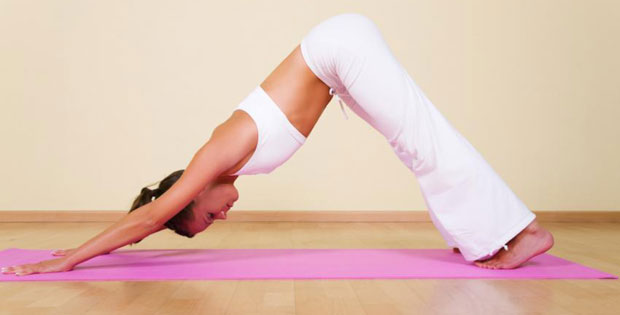
Downward dog is a classic pose where yogis can catch their breath in between poses and let the instructors words of wisdom truly sink in. This pose is a great way to start any practice, especially a Kundalini Yoga session, because it stretches out the core, upper body, back and legs.
Perfect your pose:
- Start on your hands and knees in a tabletop position. Spread your palms, with your index fingers parallel and turn your toes under.
- Press firmly into your hands and life your knees up off of the floor, keeping knees slightly bend and heels lifted.
- Let your tailbone lift towards the ceiling, straightening your spine, arms and legs. Watch the knees to make sure you don’t lock them out and damage your joints.
- Index fingers should remain firmly pressed into the floor throughout the pose. For proper alignment, keep shoulder blades close together to open the chest.
- To avoid neck strain, keep your head active between your arms instead of letting it hang freely.
- Hold this pose for 30 seconds before releasing flat on the mat.
5. Cobra Pose
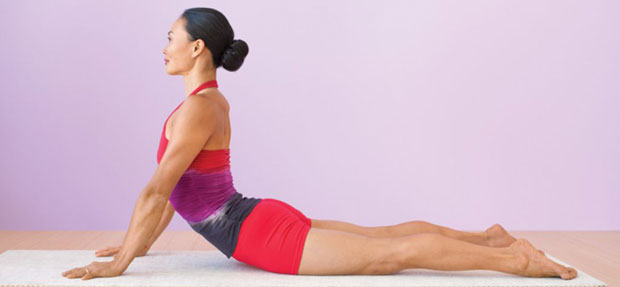
Also popular in Vinyasa Yoga, the cobra pose is used in Kundalini practices to open the chest and respiratory system and allow the yogi to take deep, meaningful breaths throughout the practice.
Perfect your pose:
- Lie with your stomach flat on the floor, with legs stretched behind you and feet and toes pressed against your mat.
- Stretch your arms slightly in front of your shoulders, and firmly press your hands into the mat.
- Using the energy from your firm press into the mat, lift your torso up off the mat until arms are straight.
- Feet, shins and thighs should remain firmly pressed to the ground.
- Open your chest by pushing your shoulder blades together and consciously keep shoulders down away from your ears.
- Take 3-5 deep breaths before releasing from this pose and laying flat, belly-down on the mat. Repeat 3-5 times.
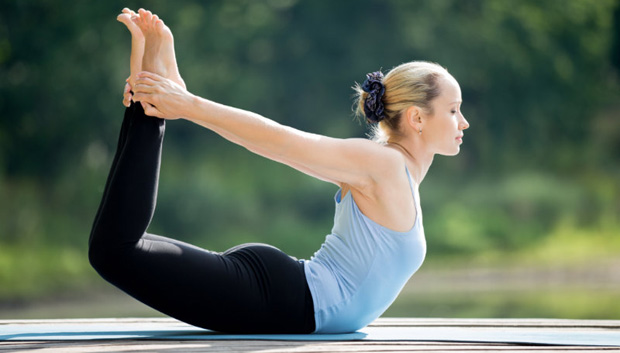
6. Bow Pose
Kundalini yogis will feel a release through the back, chest and shoulders during bow pose. This deep stretch pushes muscles to their limits while strengthening the core and lower back.
Perfect your pose:
- Start by laying flat on your stomach, legs stretched behind you and arms by each side, palms facing upward.
- On an exhale, bend your knees and bring your heels as close to your seat as you physically can.
- Carefully reach back with each hand and grab each ankle.
- On an inhale, pull your feet away from your seat and your legs off the floor. In doing so, your upper body will also raise.
- Hold at your highest point for 15-30 seconds before gently releasing.
7. Nose to Knee Pose
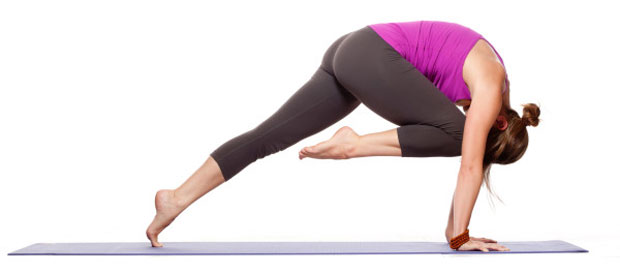 Many yogis practice this move as a way of physically and mentally connecting mind and body, by bringing the head to touch the knee. This allows you to feel grateful for your body’s capabilities, no matter how limited or inexperienced you may feel.
Perfect your pose:
- Start by laying flat on the mat with legs stretched in front of you and arms by your side.
- Bring your left leg into your chest, bending the knee and wrap both arms around the knee.
- Lift your head, bringing your nose to “kiss” the knee.
- Hold here for 10-15 seconds before releasing and switching to the other side.
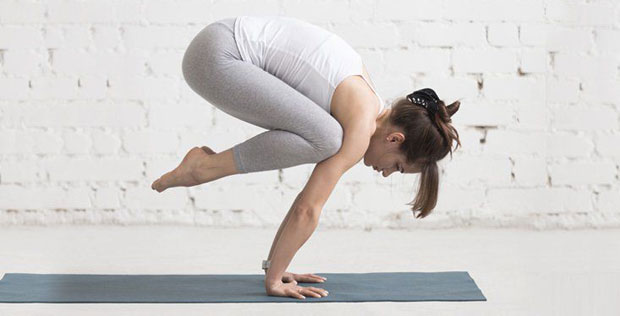
8. Crow Pose
The crow pose is perhaps the most difficult pose in all of the kundalini practice. It takes a lot of regular yoga practice to build up strength in the upper body and the confidence to allow yourself to try it. Once you’ve mastered this pose, you’ll be able to reap the rewarding benefits of better balance.
Perfect your pose:
- Start by standing upright with feet wider than hip distance apart.
- Turn the right foot slightly out to the right and left foot slightly out to the left.
- Lower your seat to hover comfortable above the ground between your feet.
- Place your hands in front of you, fingers and palms spread.
- Begin to bend your elbows as if you are creating a shelf, or doing the chatarunga pose.
- Place the right knee on top of the right elbow, and left knee on top of the left.
- Once you’ve found your balance here, rock your weight forward into your hands and lift your lower body off of the ground, only supported by your hands.
- Hold this pose for 15-20 seconds before gently bringing feet back to the ground.
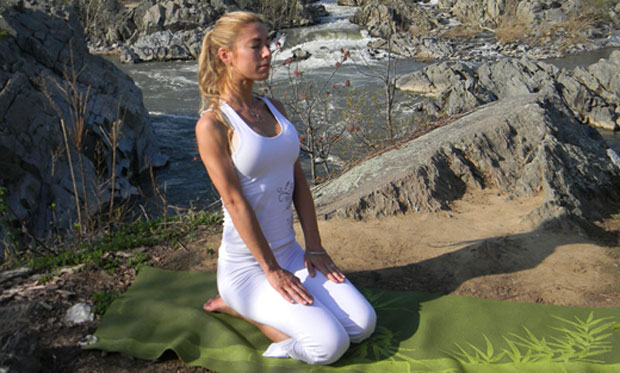
9. Rock Pose
The meditation and deep breathing aspect of kundalini is found in many poses, one of them being the rock pose. This basic pose allows you to close your eyes and drift away into your own thoughts, focusing heavily on proper breathing.
Perfect your pose:
- Start in an upright kneeling position.
- Make sure feet, thighs and knees are pressed together.
- With your hands pressed on your thighs, slowly lower your seat to rest on the backs of your feet.
- While in this position, close your eyes and practice deep breathing techniques to fully relax.
10. Lotus Pose
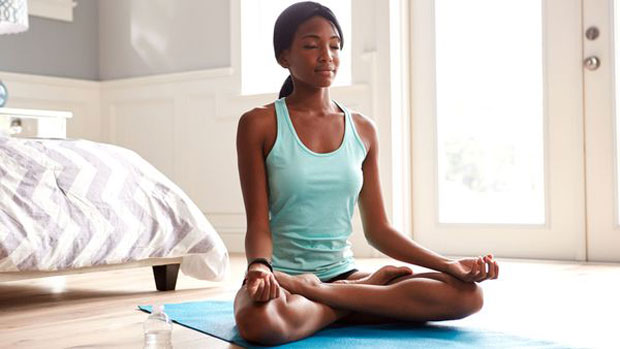 The lotus pose is used by yogis across all practices to calm the mind and ease the soul. This pose is an instant stress reliever, allowing yogis to bring their focus to their breathing instead of whatever is on their mind. The interconnectedness of the fingers symbolizes openness to the world and to change, something that all yogis strive to achieve.
Perfect your pose:
- Begin by sitting on the floor with legs stretched in front of you.
- Bend your left knee and bring the left foot to rest comfortably on the upper right thigh.
- Bend your right knee and bring the right foot to rest comfortably on the upper left thigh.
- Bring the right palm to the right kneecap and the left palm to the left kneecap. Yogis have an option of turning palms upwards and connecting the thumbs and forefingers on each hand.
- Using your breath, elongate the torso and spine.
- Tuck the chin in slightly and close your eyes.
- Stay in this pose as long as necessary to feel at peace.
11. Sitting Breath of Fire Pose
The breath of fire is a trademark of the kundalini yoga practice. This breathing is a way for yogis to immediately become in tune with their bodies and clear their mind of the daily stressors of life.
Perfect your pose:
- Sit with legs as far apart as you comfortably can.
- Reach both arms to the left foot, stretching your back and bringing your nose towards your knee.
- Release back up to the upright sitting position and repeat on the other side.
- Throughout the pose, remember to maintain the breath of fire from the pose above.
12. Standing Breath of Fire Pose
Continue to practice the breath of fire by moving from the sitting pose quickly into the standing pose.
Perfect your pose:
- Stand upright with your arms straight out to your sides so your body is making a t shape and thumbs pointing upwards.
- Begin the breath of fire by practicing long, deep breaths and then forcing the air abruptly out of your lungs.
- Repeat this process for two minutes.
13. Forward Fold Pose
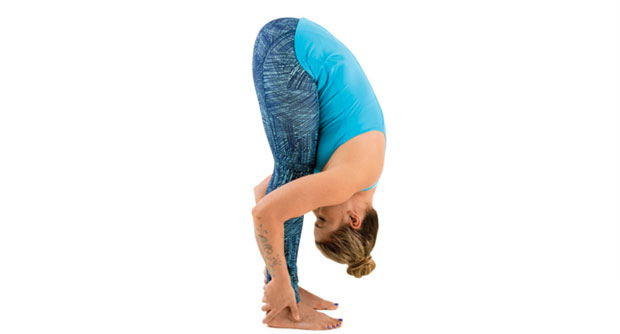
Although it may appear easy, the forward fold pose is a deep stretch that causes aches in even the most flexible hamstrings. Because of the intense fold of this pose, yogis must be in tune with a deep, steady breath, making it an ideal pose for thekundalini practice.
Perfect your pose:
- Start in a relaxed standing pose with feet hip-width apart and arms rested by your side.
- Slowly raise your arms up above you, reaching towards the ceiling, with gaze drawn above you.
- To keep the proper posture, pull the shoulder blades close together and make a conscious effort to lower shoulders away from the ears.
- Slowly fold your torso forward and bring it as close to your thighs as you can, bringing your arms downward with it. Imagine you are falling forward in a graceful, swan dive.
- Wrap your hands around each leg and use your biceps to pull your torso closer. If you cannot physically do this, let your upper body hang free and grab opposite elbows with your hands.
- Hold for 15-30 seconds before releasing.
14. Shoulder Stand Pose
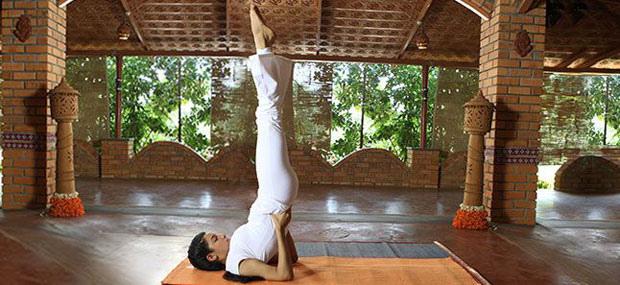
For more advanced yogis, the shoulder stand pose is a great way to intensify your practice and focus on connecting with the entire body, from shoulders to the tips of your toes.
Perfect your pose:
- Start by laying flat on your back.
- Slowly raise your legs perpendicular to the floor, keeping shoulder blades, neck and head pressed into the mat.
- Place both elbows on the ground and press your hands into your mid-back for support.
- Keep toes pointed throughout the pose to activate every muscle in your lower body.
- Hold this pose for 3-5 deep breaths before slowly bringing the legs back down to the mat.
15. Mountain Pose
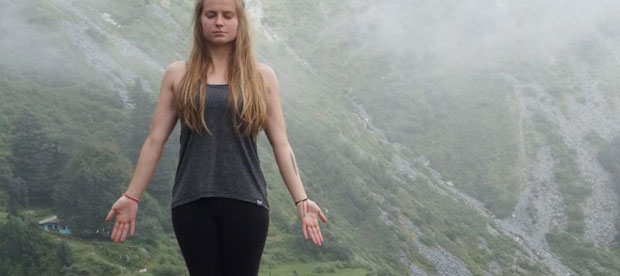
Does the mountain pose look simple to you? It may seem like you’re just standing straight up, but in reality, you’re activating every muscle in your body from your head to your toes. In fact, many yogi gurus name the mountain pose one of the physically hardest to achieve.
Perfect your pose:
- Stand upright with your feet together and hands by your side. Toes should be touching and heels slightly apart.
- Keep fingers active by pointing towards the ground as if you are reaching for something.
- Tighten your thigh muscles and activate the knee caps as if to lift them off of your shins.
- Rotate the upper thighs slightly inward.
- Tuck the tailbone under so it is facing the floor.
- Widen your collarbones and press your shoulder blades together.
- Keep your throat soft and facial muscles relaxed.
- Hold for 30 seconds to one minute.


